WATCH AND DOWNLOAD NEW MOVIES ONLINE FOR FREE

The World top 10 countries for IT industry (තොරතුරු තාක්ෂණය සඳහා ලෝකයේ හොදම රටවල් දහය)


How are you my friends? Today, on my dhutunodhutu blog, I thought to tell you about the world’s top 10 countries which warmly welcome the IT industry along with explanations. I hope that this article will be useful to all of you who are currently/who are willing to work in the IT industryand also to the others who wish to learn something more every day. Let’s find out!
(Translation:- ඉතින් කොහොමද යාලුවනේ ඔන්න අදත් මම මගේ දුටු නොදුටු blog එකෙන් කතා කරන්න හිතුවෙ දැනට IT ,එහෙමත් නැත්නම් තොරතුරු තාක්ෂණය වෙනුවෙන් ලෝකයේ පවතින හොදම රටවල් දහය මොනාද ,ඇත්තටම එහෙම කියන්න හේතු වුන කරුණු මොනාද  කියලත්,ඉතින් දැනට IT industry එකේ වැඩ කරන ,ඒ වගේම IT industry එකට එන්න ආසාවෙන් ඉන්න අපේ යාලුවන්ට වගේම දැනුම හොයාගෙන යන අපේ යාලුවන්ටත් මේ ලිපිය ගොඩක් වැදගත් වේවි කියලා හිතනවා.එහෙනම් අපි වැඩි විස්තර මේ ලිපිය ඇතුලෙදි කතා කරමු ,)

As far as I know, the first step of IT takes place in 1976 by Bill Gates and Paul Allen and I guess that I am right if I say that this creation has influenced worldwide. This is because, during these centuries, IT has affected our day to day lives and also every other field. So, in this evolving world, let’s see what the top 10 countries which are developed more than the other countries in the IT field are.
(Translation:- ඇත්තටම යාලුවනේ මන් දන්න ඉතිහාසයට අනුව IT ක්ෂේත්‍රයට මූලික අඩිතාලම වැටෙන්නේ 1976 ,Bill Gates සහ Paul Allen කියන දෙන්නගෙ ප්‍රධානත්වයෙන් ,ඉතින් එහෙම ආරම්භ වුන මේ ක්ෂේත්‍රය අද වෙද්දි මුළු ලෝකයම ආක්‍රමණය කර අවසන් කිව්වොත් මන් නිවැරැදි,ඉතින් මේ දශක කිහිපයේ මුළු ලෝකයේ සෑම අස්සක් මුල්ලක් නෑරම අපි හැම කෙනෙක්ටම ඉතාමත් අතයවශය ඕනෑම ක්ෂේත්‍රයකට බලපෑමක් කල හැකි තත්වයට මේ තොරතුරු තාක්ෂණය (IT) පත්වෙලා අවසන් ,ඉතින් මේ දියුණු වෙන ලෝකයේ ,මේ තොරතුරු තාක්ෂණය (IT) ඉතාමත් වේගයෙන් වර්ධනය වෙන රටවල් බොහොමයක් තිබෙනවා ,ඉතින් ඒ අතරින් ප්‍රධානතම රටවල් දහය ගැනයි මන් ඔයාලට අද මේ කියන්න ආරම්භ කරන්නේ ,)


1.Finland – According to the statistics of the 2014’s GITR, Finland has become, for 2 consecutive years, the country which cares the most about IT and its development. The reason to this is because they have the best digital infrastructure in the world with 90% of the population using the internet and they also have the highest level of innovation since the mid-1990s.
(Translation:-1. Finland - 2014 වර්ෂයේ ගෝලීය තොරතුරු තාක්ෂණ වාර්තාවට  (GITR)  පිට පිට දෙවැනි වතාවටත් ෆින්ලන්තය තොරතුරු තාක්ෂණය වැලඳ ගන්නා ප්‍රධානතම රට බවට පත්වෙලා තියෙනවා.ඊට හේතුව වශයෙන්  ඔවුන් දක්වන්නේ දැනට ලෝකයේ පවතින විශිෂ්ටතම ඩිජිටල් යටිතල වියුහය ෆින්ලන්තය සතුව පැවතීමත්, ඒ වගේම  ෆින්ලන්තයේ 90%ක් පමණ අන්තර්ජාල භාවිතයටත් ,1990 දශකයේ මැද භාගයේ සිට මේ දක්වා  ඉතා ඉහළ මට්ටමේ නවීකරණයන් වලට හිමිකම් කීමත් මේ සඳහා හේතුවී තිබෙනවා .)


2. Singapore – As it has the best and high quality educational system, become a centre of information technology and has a very high level of infrastructure, Singapore has been qualified for the second best country.
(Translation:- 2.Singapore - දැනට ලෝකයේ පවතින හොදම සහ ගුණාත්මක අධයාපන ක්‍රමවේදයට හිමිකම් කීමත් ,තොරතුරු තාක්ෂණයේ මධ්‍යස්ථානයක් බවට පත්වීමත් ,තාක්ෂණික යටිතල පහසුකම් ඉතාමත් දියුණු මට්ටමේ පැවතීමත් යන හේතු වීමත් මෙය දෙවෙනි හොදම තොරතුරු තාක්ෂණික රට බවට පත්වීමට හේතු වි තිබෙනවා .)


3.Sweden – Although tax rates are very high, as all digital equipment and services are cheaper to buy and as it is a knowledge based society, many people select Sweden to involve more in ITwhich caused it to qualify for the third place.
(Translation:- 3.Sweden - බදු අනුපාතයන් ඉතා ඉහළ මට්ටමක පැවතියත් ,සියලුම ඩිජිටල් යටිතල පහසුකම් ඉතා ලාභදායි වීම නීසා බොහෝ දෙනා තොරතුරු තාක්ෂණය සඳහා යොමුවීමත් ,දැනුම පදනම් කරගත් සමාජයක් බවට පත්වීමත් නිසා ස්වීඩන් රාජ්‍ය තෙවැනි ස්ථානයට පත්වී තිබෙනවා.)


4. Netherlands – The government has identified its value as most public services are based on the internet and also because more innovations and competitions are arising due to the importance of IT, thus Netherland became another hub in the world.
(Translation:- 4.The Netherlands - බොහොමයක් රාජ්‍ය සේවා අන්තර්ජාලය මත පදනම් වීමත් ,තොරතුරු තාක්ෂණයේ වැදගත්කම මත එය වැඩි දියුණු කිරීමට නව සොයාගැනීම් සහ තරගකාරීත්වය ඉහළ නැන්වි,ඒ වටිනාකම රජය මගින් හදුනා ගෙන තිබීමත් මෙය තොරතුරු තාක්ෂණයේ තවත් එක් කේන්ද්‍රස්ථානයක් බවට පත්වීමට හේතුවී තිබෙනවා.)


5. Norway–95% of the Norwegians make use of the internet, 90% of the population have their own personal computers and internet connections and they are well equipped for advanced infrastructure. As a result, Norway is the 5th best country in the world.
(Translation:- 5.Norway - 95% ක් පමණ වූ නෝර්වේජියානුවන් අන්තර්ජාලය පරිහරණය කිරීමත් ,90%ක් පමණ පිරිසට තම තමන්ගේ පුද්ගලික පරිගණක සහ අන්තර්ජාල සම්බන්ධතාවක් තිබීමත් දියුණු යටිතල පහසුකම් වලට හිමිකම් කීමත් මෙය පස්වෙනි ස්ථානයට පත්ව තිබිමට හේතුවී තිබෙනවා.)


6.Switzerland – Due to the use of digital infrastructure in businesses and the use of advanced IT tools for the education in the face of the rich economy, Switzerland has the 6th place.
(Translation:- 6. Switzerland - බොහෝමයක් වියාපාරයන් සඳහා ඩිජිටල් යටිතල පහසුකම් යොදාගෙන තිබීමත්,පොහොසත් ආර්ථිකයත් හමුවේ අධයාපනය සඳහා දියුණු tතොරතුරු තාක්ෂණික මෙවලම් භාවිතා කිරිමත් මෙය හයවෙනි ස්ථානයට පත්ව තිබිමට හේතුවී තිබෙනවා.)


7.United States of America – Guys, I ain’t got much to tell you about this country as most of you already know. While there is a small downturn in the IT field, many businesses and individuals have been given the opportunity to develop the Information Technology; and due to the good functioning of other facilities, this country is in the 7th place.
(Translation:- 7. United States of America - ඉතින් යාලුවනේ ඔයාලට මේ රට ගැන අමුතුවෙන සදහන් කරන්න අවශ්‍ය නැහැනෙ,තොරතුරු තාක්ෂණ ක්ෂේත්‍රයේ යම් කුඩා පසුබෑමකට ලක්ව තිබුනත්,බොහෝමයක් වියාපාරික හා තනි පුද්ගලයන්ට තොරතුරු තාක්ෂණය දියුණු කිරීමට අවස්ථාව ලබාදීමත් ,අනෙක් යට්තල පහසුකම්වල මනා ක්‍රියාකරීත්වයත් නිසා මෙය මෙය හත්වෙනි ස්ථානයට පත්ව තිබෙනවා.)


8.Hong Kong–It was able to come 5 places up to the 8th place from its original position due to the provision of good training skills which were granted by the business and the government.
(Translation:- 8.Hong Kong - පෙර තිබූ ස්ථානයේ සිට ස්ථාන හයක් ඉදිරියට පැමිණෙමින් අටවන ස්ථානයට පත්වීමට ප්‍රධානතම හේතුව වී තිබෙන්නේ මනා නිපුණතා පුහුණුවක් හා විවසායකයන් සදහා වියාපාර මෙන්ම රජයේ අනුග්‍රහයද ලබාදී තිබීමයි.)

9. United Kingdom – Losing its initial place, going 2 places down, UK is still among the top 10 countries because it has recognised the importance of the IT industry. As a result, they took the initiative to make it more competitive by creating the E-commerce environment.
(Translation:- 9.The United Kingdom - පෙර තිබූ ස්ථානය අහිමිව ස්ථාන දෙකක් පහලට පැමිණ තිබුනත් තවම මූලික දහදෙනා අතර පැවතීමට ප්‍රධානතම හේතුව වන්නේ තොරතුරු තාක්ෂණයේ වැදගත්කම හඳුනා ගනිමින් එය තරගකාරි ක්ෂේත්‍රයක් බවට පත්කිරිමට නවෝත්පාදනයන් බිහිකිරීමත් එහි ප්‍රතිඵලයක් ලෙස E-commerce පරිසරයක් ඇතිවීමත් යන කරුණුයි .)


10. South Korea – Last but not least, there is South Korea which was in the 9th place in the past. The IT industryhas become a very important factor and effective strategy for the economic development and success of the country which allowed it to be in the 10th place.
(Translation:- 10. South Korea - මුලික දස දෙනාගේ අවසාන රටවන සවුත් කොරියාව මීට පෙර පැවතියේ එක් ස්ථානයක් ඉහළින් වීමත් ,රටේ සාර්ථකත්වයට තොරතුරු තාක්ෂණය ඉතාමත් ගැබැඹුරින් බලපා ඇති රටක් විමත් ,සිය රටෙහි ආර්ථික සන්වර්ධනයට තොරතුරු තාක්ෂණය තවත් එක් උපාය මාර්ගයක් කරගැනීමත් යන කරුණු මෙම තත්වයට පැමිණීමට ඉවහල් වී තිබේ.)

That’s it for today my dear friends. I hope I was helpful to you and that you guys enjoyed reading my article. Pls comment below and lemme know any improvements, suggestions, criticise and ask any questions. You can also like our Facebook page and contact us. See ya’ll later.
(Translation:- ඉතින් යාලුවනේ ඔයාලත් IT ක්ෂේත්‍රයෙන් විදෙස් ගතවෙන්න බලාපොරොත්තුවෙන් ඉන්න කෙනෙක්නම් ,එහෙමත් නැත්නම් යුරෝපීය රටක ඉන්න කෙනෙක්නම් ඔයාට මේ ලිපිය විශේෂයෙන්ම වැදගත් වේවි කියල හිතනවා.එහෙනම් යාලුවනේ මේ post එක ගැන ඔයාලට හිතෙන ,තව ඇතුලත් විය යුතු දේවලුත්,ඉදිරියට සාකච්ඡා කළයුතු දේවලුත් තියෙනවනම් පහත Comment තීරුවෙන් comment කරන්න ,එහෙමත් නැත්නම් අපේ Facebook page එකට එකතු වෙලා අපිට Message කරන්න,Comment කරන්න කියල ඉල්ලනවා .එහෙනම් තවත් මේ වගේ ලිපියකින් අපි හම්බවෙනකම්  හැමෝටම සුබ දවසක් ප්‍රාර්ථනා කරනවා.................................................................................................)


What is the safest way to hide or change your own IP Address (IP address එකක් Hide කරන්න පුලුවන් ආරක්ෂිත ක්‍රමවේදයන් සහ ඒ ක්‍රමවේදයන්ගේ එකිනෙකට වෙනස් වාසි(Pros) සහ අවාසි(cons))


Hi guys, today I am going to talk about a topic which I have mentioned before but which I haven’t discuss enough so, let’s explore what are the additional tips I can give you.
(Translation:-ඉතින් යාලුවනේ ඔන්න අදත් මම ඔයාලට මගේ දුටු නොදුටු blog එකෙන් මම මීට කලින් සාකච්ඡා කරපු ඒත් වැඩි දුරටත් සාකච්ඡා නොකරපු මාතෘකාවක් ගැන සාකච්ඡා කරන්න ඕනි කියල හිතුව ,ඉතින් එහෙනම් අපි මේ ගැන වැඩි විස්තර  ලිපිය ලියනගමන් සාකච්ඡා කරමූ.)

You all know that in order to surf the internet we require the help of an internet service provider. So when we log on to such services we are provided with an IP (Internet protocol)address or in other words, an identity, which easily allows others to identify the region or country from where we accessing the internet. Thus, today I am going to tell you guys how to change the IP address into one which is from another country or region so that you will navigate as an anonymous person.
(Translation:-ඔයාලා හැමෝම දන්නවනෙ යාලුවනෙ අපිට අන්තර්ජාලයෙ සැරිසරන්න (Internet surf කරන්න ) අපිට අන්තර්ජාල සේවාවන් සපයන (Internet service provider) කෙනෙකුගෙ සහය අතයවශයි කියලා.ඉතින් අපි එහෙම සේවාවන් වල ලියාපදිංචි වුනහම අපිට ඔවුන් මාර්ගයෙන් IP address (Internet protocol) එකක් ,එහෙමත් නැත්නම් අපිටම අන්තර්ජාලයේ සැරිසරන්න වෙන් වූ අනන්‍යතාවයක් ලැබෙනවා ,ඉතින් මේ මාර්ගයෙන් පුලුවන් අන්තර්ජාලයේදි අපිව මොන රටක ,මොන කලාපයේ පුද්ගලයකුද කියල ඉතා ලේසියෙන්ම අදුර ගන්න,ඉතින් යාලුවනේ මන් අද ඔයාලට කියන්න යන්නෙ කොහොමද අපි අන්න අර මන් මුලින් සඳහන් කරපු IP address  එක අපිට අවශ්‍ය විදිහට වෙනස් කරල ,අපිට වෙනත් රටක ,වෙනත් කලාපයක පුද්ගලයෙක් විදිහට (Anonymous Person) අන්තර්ජාලයට යන්නෙ කියලයි .)

Before moving onto the methods, I thought that I must tell you more about what this IP changing/IP hiding is. As I have mentioned before, you already know what the purpose of the ISP (Internet Service Provider)is so my friends, we are able to access its service from our homes, offices or any other place via a Wi-Fi router and an ADSL cable or mobile data, for those of you who access viaphones or dongles. Now, look at this image below.
(Translation:-ඉතින් යාලුවනේ ,ඒ ක්‍රමවේද කිහිපය ගැන කියල දෙන්න කලින් මන් හිතුව ඔයාලට ඇත්තටම අපි මේ IP hide කරනවා ,එහෙමත් නැත්නම් IP change කරනවා කියන්නෙ මොකක්ද ?..කියන එක ගැන කියල දෙන්න ඕනි කියල ,ඉතින් ඔයාල හැමෝම දන්නවනෙ යාලුවනේ දැන් මන් අර කලින් සදහන් කරපු ISP (Internet service provider) ගේ කාර්‍ය මොකක්ද කියලා ,ඉතින් යාලුවනේ අපිට ඇත්තටම අපේ ගෙදරදි ,office එකේදි ඒ වගේම,වෙනත් ඕනෑම ස්ථානයකදි අපිට ඒ ISP (Internet service provider) කාර්‍ය කරල දෙන්නෙ අපේ  wifi router එකයි ADSL cable එකයි කියලා ,එහෙමත් නැත්නම් ඔයාල Dongle එකක් ,Moblie phone එකක් භාවිතා කරන කෙනෙක්ටනම් Mobile data වලින් කියලා,ඉතින් මන් මේ පහලින් පෙන්නන Image එක දිහා හොදින් බලන්නකො එතකොට ඔයාලට වඩාත් තේරුම් යයි මන් මේ කියන දේ,)
                                         
In order to change/hide the IP Address we are using this ISP (Internet Service Provider) and a Proxy browser, VPN proxy server, Smart DNS server or a Tor browser used by the internet. Whatever the method you are going to select, the result is that your IP address will be changed to another country’s or region’s one.In order to understand it more clearly, look at this picture.
(Translation:-ඉතින්  යාලුවනේ ඔයාල IP hide කරන්න එහෙමත් නැත්නම් IP change කරන්න අපි භාවිතා කරන්නෙ මේ ISP (Internet service provider) සහ අන්තර්ජාල සේවාව අතරට යොදාගන්නා Proxy browser එකක් ,VPN proxy server  එකක් ,Smart DNS server එකක් හෝ එහෙමත් නැත්නම් Tor browser එකක් වගේ ක්‍රමවේදයන් කිහිපයකින් ඔයාල තෝරා ගන්නා එක ක්‍රමවේදයක්,ඉතින් මේ හැම විදියකින්ම සිදුවෙන්නේ  ඔයාගෙ IP address  එක වෙනත් රටක හෝ වෙනත් කළාපයක එකක් බවට පෙන්වීමට සැලැස්වීමයි.ඉතින් මන් මේ පහලින් පෙන්නන Image එක දිහා හොදින් බැලුවොත් ඔයාලට වඩාත් හොදට තේරුම් යයි මන් මේ කියන දේ,)
                                 
Many countries are buying and even using this type of service because it allows them to even access sites which are not allowed to be viewed.
(Translation:-ඉතින් යාලුවනේ මේ විදිහට මේ සේවාව අලෙවි කරන්න බොහො ප්‍රධාන රටවල ,එහෙමත් නැත්නම් ඒ රටවල් කීපයක් එකතුවෙලා මේ සේවාව ඉතා විශාල වශයෙන් පවත්වගෙන යනවා ,ඇත්තටම ඒ මගින් සමහර රටවල වෙනත් පුද්ගලයන්ට බැලීමට අවසර නැති වෙබ් අඩවි වලට පවා ඇතුලු වෙන්න අවස්ථාවක් ලැබී තිබෙනවා.)

Let us look at the diverse methods and their advantages and disadvantages:
(Translation:-එහෙනම් අපි බලමු යාලුවනේ ඒව ක්‍රමවේද මොනාද වගේම එහි වාසිදායක (pros) සහ අවාසිදායක (cons) තත්වයන් මොනාද කියල ,)

1.Free Proxy Browser – This can be easily used. You just need to search Free Proxy Browser from an ordinary Browser (Chrome, Internet Explorer, Opera mini). Then, you need to select a Free Proxy Service which you retain suitable, select the country and the options and then you can search the website or the keyword in the search tab and begin to surf! (You can get a clearer idea if you look at the image below). However with this method, there can be issues with the security and internet speed because all these servers are not fast like the remote servers which we use to navigate the internet. We may also get Malware and Spams in the format of Ads thus my personal opinion is not to log in to your private accounts when using these servers.
(Translation:-1.Free proxy browser - ඇත්තටම ඉතාම ලේසියෙන් අපිට මේ ක්‍රමය භාවිතා කරන්න පුලුවන්,ඔයාලට කරන්න තියෙන්නෙ ඔයාල භාවිතා කරන සාමාන්‍ය browser(chrome,Internet Explorer,Operamini) එකෙන් Free proxy browser කියලා search කරන එක විතරයි.ඊට පස්සේ  ඔයාලට හොදයි කියල හිතෙන Free proxy service එකක් select කරලා, ඔයාට අවශ්‍ය රටයි ,options ටිකයි දීල ,search tab එකේ ඔයාලට Surf  කරන්න අවශ්‍ය වෙබ් අඩවිය හෝ keyword එක type කරන එක විතරයි.ඔයාලට වැඩිදුරටත් අදහසක් ගන්න පුලුවන් පහලින් තියෙන Image එක දිහා හොදින් බැලුවොත්,හැබැයි මේ ක්‍රමයෙදි ඔයාලගෙ security වගේම Internet speed එක ගැන බොහෝ ගැටලු මතුවෙන්න පුලුවන් ,මොකද මේ හැම server එකක්ම අපි Internet යාමට භාවිතා කරන Remote server එක තරම් වේගවත් නොවෙන්නත්,මේ හරහා Ads විදියට Malware,spams වගේ දේවල් එන්න පුලුවන් වගේම නිතරම ක්‍රියාත්මක නොවීමත් ඉතා අවාසිදායක තත්වයක් ,ඉතින් මගේ පුද්ගලික අදහසනම් මෙමගින් ඔයාලගෙ private accounts වලට log වෙන්න යාම බෙහෙවින් අවාදානම් සහගතයි කියලා,)


2.VPN (Virtual Private Network) proxy server – This method is a bit hard to get it for free because I have seen that many VPN (Virtual Private Network) proxy servers ask for a small payment in order to be used but the high quality VPN (Virtual Private Network) proxy server give us the opportunity to try it as a trial version (Eg: Nord VPN, VyPr VPN, Catus VPN) I also have to tell you guys to be careful from the sites which give you this service for free. This method is safer than the one which I mentioned previously and as our cash files are stored by these Servers, it allows faster navigation. However, it also has some drawbacks. You have to pay a small amount either every month or every year and also as the size of the server has a certain capacity, it limits the time of navigation.
(Translation:-2. VPN (Virtual Private Network) proxy servers - මේ ක්‍රමවෙදයනම්  ඔයාලට නොමිලේ ලබා ගන්න තරමක් අපහසුයි ,මොකද මන් දැකල තියෙන ගොඩාක් VPN (Virtual Private Network) proxy servers වල සේවාව ලබාගන්නනම් අපිට සුළු ගානක් වියදම් කරන්න සිදුවෙනවා ,ඒත් ඉතාම උසස් ගණයෙ VPN (Virtual Private Network) proxy servers අපිට  Trial version එකක් විදියට භාවිත කරන්න ආයතන අවස්ථාව ලබාදීල තියෙනවා . (උදා:-Nord VPN,VyPr VPN,catus VPN වගේ) ඒ වගේම කියන්න ඕනි මේ සේවාව නොමිලේ ලබාදෙන වෙබ් අඩවි වලින් තරමක් ප්‍රවේශම් වෙන්න කියලා .ඒ වගේම කියන්න ඕනි මේ ක්‍රමය මන් කලින් සඳහන් කරපු ක්‍රමයට වඩා ආරක්ෂිතයි වගේම ,මේ Servers මගින් අපේ cache files store කරගන්න නිසා වේගයත් තරමක් වැඩී ,මෙහි අවාසි කීපයකුත් පවතිනවා ,ඒ තමයි අපිට හැම මසකටම හෝ අවුරුද්දකට සැරයක් මේ සඳහා යම් පිරිවැයක්  වැය කරන්න සිදුවීමත්,server එකේ capacity එකේ ප්‍රමාණය   හරහා අපිට ඉතා සීමා සහිතව අන්තර්ජාලයේ සැරිසැරීමට සිදුවීමත් කියන අවාසිදායක තත්වයන්,)

Now I will show you how to set up a VPN (Virtual Private Network) proxy server.
(Translation:-එහෙනම් දැන් මන් ඔයාලට කොහොමද VPN (Virtual Private Network) proxy server එකක් Set -Up කරන්නෙ කියල පෙන්ම්නන්නම් )

* For this I am using an Open VPN Proxy Serverwhich, as many people have recommended to me, is good. Firstly, you have to go register on the Service Provider where you are planning to buy your VPN Proxy Server and then you have to select the service which matches your OS (Operating System) and download and install the Software which is most suitable.
(Translation:-* මන් මේකට යොදාගන්නෙ ඇත්තටම මට බොහෝ දෙනෙක් හොදයි කියල  තහවුරු කරපු  Open VPN proxy server එක.ඉතින් යාලුවනෙ ඔයාල මුලින්ම කරන්න ඕනි ඔයාලා මේ VPN proxy server එකක් මිලදී ගන්න කැමති  service provider ගේ වෙබ් අඩවියට ගිහින් Register වෙන එකයි ,ඊට පස්සෙ ඔයාලගෙ OS (Operating System) එකට ගැලපෙන ඔයාට අවශ්‍ය සේවාව තෝරගෙන එයට අදාළ Software එක  download කරගෙන ඒක Install කරගැනීමයි.)


* Then you have to download the Configuration File and unzip it. Following, you need to copy and paste that file into the Open VPN Configuration Folder (default - C:/Program files/OpenVPN/config/)
(Translation:-*.ඊළඟට ඔයාලාකරන්න ඕනි Configuration File එක Download කරගෙන ඒ File එක Unzip කරන එක ,ඊට පස්සේ ඒ File එක Open VPN Configuration Folder (default - C:/Program files/OpenVPN/config/) කියන Folder එකට copy,paste කිරිමයි.)


* The next step is to provide the Administrator privileges to this file in order to Run this Software. In order to this you need to click the Open VPN GUI Icon which is available in Desktop and tick the box. 
(Translation:-*. ඊළඟ පියවර වෙන්නෙ ඔයාලා මේ Software එකට Run වෙන්න Administrator priviledges ලබාදීමයි ,ඉතින් මේකට ඔයාලා Deskstop එකේ තියෙන Open VPN GUI icon එක click කරලා tick කරන එක විතරයි .)


* Finally you need to connect this VPN to the Internet
(Translation:-*.ඉතින් යාලුවනේ අවසානෙටම ඔයාලා කරන්න ඕනි මේ VPN එක Internet එකට Connect කරන එකයි.)


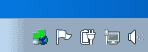
* If you have completed all this steps carefully you should get the Active Icon in green colour as you can see in the image below.
(Translation:-*. ඔයාලාමේ කොටස් කීපය සාර්ථකව නිමකලාට පස්සෙ ඔයාලට මේ අන්තිම Image එකේ වගේ කොලපාටින් Active icon එක පෙන්නාවි,)

           
* Now, like in this image, you can determine if your VPN Proxy Server is active or not.
(Translation:-*.දැන් ඔයාලට පුලුවන් ඔය උඩ Image එකේ වගේ ඔයාලගෙ VPN proxy server එක active ද කියල හරියටම තහවුරු කරගන්න.)

3.      Tor Browser – As I have spoken about this one a lot in my previous articles, today I will tell you how to select any country’s IP Address via a TOR Browser. The very first step is to have installed a TOR Browser. When you install it, if you don’t select a specific path it will automatically install to your desktop then you have to selectthis Desktop\Tor Browser\Browser\TorBrowser\Data\Tor\torrc-defaults file and open it in Note Pad.
(Translation:-3.Tor browser - ඉතින් යාලුවනේ ඔයාලට මන් Tor browser එක ගැන මීට කලින් ලියපු පොස්ට්  එකේ ගොඩක් විස්තර සඳහන් කරල තියෙන නිසා ,Tor browser  එකෙන් ඔයාලට ඕනි රටක IP address එකට වෙනස් කරන්නෙ කොහොමද කියල මන් අද කියලා දෙන්නම්,ඇත්තටම මේකට ඔයාලා මුලින්ම Tor browser එක Install කරගෙන ඉන්න අවශ්‍යයයි.ඉතින් ඔයාලා එහෙම Install කරපු Tor browser එක ඔයාල Path එකක් select නොකලොත් automatically Install වෙන්නෙ Dekstop එකට නිසා ,ඔයාලට ඒ Folder එක ඉතා ලේසියෙන්ම හොයාගන්න පුලුවනි,ඉතින් ඒ Folder  එකේ Desktop\Tor Browser\Browser\TorBrowser\Data\Tor\torrc-defaults  කියන File එක Note Pad එකෙන් Open කරගන්න ,)


* Now on top of AvoidDiskWrites 1 you have to type ExitNodes {US} ({} in this you have to put the country you wish to use for your IP Address)
(Translation:-*. දැන් ඔයාලා කරන්න ඕනි, AvoidDiskWrites 1කියන එකට උඩින් ExitNodes {US} ( {} මේකට ඔයාල දාන්න ඕනි ඔයාලට IP Address එක ලබාගන්න අවශ්‍ය රට ) කියලා type කරලා save කරන්න.)


Surf the internet for a small time on your TOR Browser then if you check out your IP Address, you will find out how it has changed to the country which you requested.
(Translation:-*දැන් ඔයාලා  පොඩි වෙලාවක් Tor browser එකෙන් Internet එකේ surf කරන්න ,ඊට පස්සේ ඔයාලා IP Address එක check කලොත් ඔයාලටත් බලගන්න පුලුවන් කොහොමද Tor browser එකේ IP Address එක ඔයාලට අවශ්‍ය රටේ විදියට වෙනස් වෙලා තියෙන්නෙ කියලා .)
                              
4. Smart DNS (Domain Name System) Server – This also can be easily set up like the VPN Proxy Server. Due to its numerous disadvantages is not a famous method however one of the advantages is that it is faster than the VPN Proxy Server.
(Translation:-4.Smart DNS (Domain Name System) server - මෙයත් ඔයාලට මන් දැන් කියල දුන්න VPN proxy server එක වගේම ඉතා ලේසියෙන්  Set Up කරගන්න පුලුවන් server එකක්, එහෙත් මෙහි ඇති අවාසිදායක තත්වයන් කීපයක් නිසා මෙය ඉතා ජනප්‍රිය ක්‍රමයක් බවට පත්වී නැහැ ,එහෙත් මෙහි වේගය VPN proxy server එකට වඩා වැඩිවීම මෙහි වාසිදායක තත්වයක් ලෙස සලකන්න පුලුවන්,)

That’s it for today my dear friends. I hope I was helpful to you and that you guys enjoyed reading my article. Pls comment below and lemme know any improvements, suggestions, criticise and ask any questions. You can also like our Facebook page and contact us. See ya’ll later.
(Translation:-ඉතින් යාලුවනෙ මේ post එක ගැන ඔයාලට හිතෙන ,තව ඇතුලත් විය යුතු දේවලුත්,ඉදිරියට සාකච්ඡා කළයුතු දේවලුත් තියෙනවනම් පහත Comment තීරුවෙන් comment කරන්න ,එහෙමත් නැත්නම් අපේ Facebook Fan page එකට එකතු වෙලා අපිට Message කරන්න,Comment කරන්න කියල ඉල්ලනවා .එහෙනම් තවත් මේ වගේ ලිපියකින් අපි හම්බවෙනකම්  හැමෝටම සුබ දවසක් ප්‍රාර්ථනා කරනව......................)


Hidden Tools of windows 7 (වින්ඩෝස් 7 වල අපි නොදන්න සැඟවුණු මෙවලම්)


Hi guys, today I’m bringing up another interesting topic. Although it may not be a new experience to many of you, I thought, that to our Sri Lankan explorers, this article may be somewhat useful in order to gain a new knowledge. So, let’s discover more on this topic as we move on.
(Translation:- ඉතින් යාලුවනෙ ඔන්න අදත් මම මගේ දුටු නොදුටු blog එකෙන් තවත් ඔයාලට වැදගත් වෙයි කියල හිතෙන අලුත්ම  ලිපියක් ගෙනාවා. ඇත්තටම මේක මන් හිතන විදිහට අපේ ගොඩක් යාලුවන්ට අලුත් අත්දැකීමක් නොවෙන්න පුලුවන් ,ඒත් සාමාන්‍යයෙන් අපේ පුන්චි ලංකාවේ දැනුම හොයාගෙන යන බහුතරයට මෙයින් යම් අත්දැකීමක් ලබන්න පුලුවන් වෙයි කියලා හිතුන නිසා මන් අද මේ ලිපිය ලියන්න හිතුවා.ඉතින් යාලුවනේ අපි එහෙනම්  වැඩි විස්තර ලිපිය ඇතුලෙදි කතා කරමු .)

All of us know that by now, the world’s most used operating system is the Windows OSwhere the Windows 10 version has already been released to the market. However in 2009, we were introduced to the Windows 7 which became a new experience when compared to the versions of Windows XP Professional and Windows Vista. The speciality of Windows 7 is that it was released with new tools which were not present in the versions of Windows XP Professional and Windows Vista. Moreover, I think that you all may agree if I say that the format of windows 7is similar to that of Windows 10 which we are using now-a-days. So my friends, let’s see what are the features which we still may not know about Windows 7.
(Translation:- ඔයාල හැමෝම දන්නවනෙ අද වෙද්දි ලෝකයේ බහුලවම භාවිතා වෙන්නේ windows OS එක කියලා,ඉතින් මේ වෙනකොට windows 10 පවා වෙළඳ පොළට ඇවිත් ටික කාලයක් වෙනවා.ඒත් 2009 මැද භාගය වෙනකොට අපි හැමෝටම මේ windows 7 කියන්නෙ අලුත් අත්දැකීමක් වුනා කිව්වොත් මන් නිවැරැදි ,මොකද Windows XP Proffesional සහ Windows Vista කියන version දෙකටම පස්සෙ තමයි මේ Windows සමාගම Windows 7 අපි අතරට එවන්නේ අලුත්ම ,එහෙමත් නැත්නම් Windows XP Proffesional සහ Windows Vista කියන OS දෙකටම වඩා වෙනස් උන  මෙවලම් (Tools) බොහෝමයකින් සමන්විත කරල,ඉතින් ඇත්තටම කිව්වොත් අද අපි භාවිතා කරන windows 10 වල පවා කිසිදු වෙනසකින් තොරව අපිට දකින්න තියෙන්නෙ මේ Windows 7 වල ආකෘතිය (Architecture equality of windows 7) කිව්වොත් ඔයාල හැමෝම එකඟ වෙයි.ඉතින් යාලුවනේ මෙහෙම ආපු Windows 7 වල අපි දැනගෙන හිටියට වඩා නොදැන හිටිය කොටස් වැඩී කිව්වොත් මන් නිවැරදී,ඉතින් අපි බලමු එකින් එක ඒ මොනාද කියල,)

1. Snipping Tool:- You guys know that in order to get a screen shot we use the PrtScr/SysRqkeyboard buttons, so this snipping tool also does the same but more valuable thing. We are able to crop any part of the screen and select or delete any part that we want. We can find this tool in the following path: Start>All programmes>Accessories.
(Translation:- 1. ස්නිපින්ග් ටුල් එක (Snipping tool) -ඇත්තටම ඔයාල දන්නවනෙ යාලුවනේ අපි screeen shots ගන්න භාවිතා කරන්නෙ Prt Scr /SysRq කියන key board button එක කියල,ඉතින් මේ Snipping tool එක කරන්නෙත් ඒහා සමාන ඊටත් වඩා වටින දෙයක්,ඒ තමයි මේකෙන් අපිට screen එකේ ඕනිම කොටසක් අපිට අවශ්‍ය විදියට crop කරගන්න ,ඒ කොටසේ අවශ්‍ය ස්ථාන සලකුණ ුකරන්න ,අනවශ්‍ය කොටස් මකල දාන්නත් පුලුවන් ,ඉතින් මේ tool එක ඔයාලට start -> All Programmes -> Accessories ගියොත් දැක ගන්න පුලුවනි.)


2. On-screen Keyboard: This is a very simple tool. It is the exact same copy of the keyboard which we are using but on the screen. This could also be another option for the ones who have keyboards with malfunctioning keys. The path to this tool is: Start > All programmes > Accessories > Ease of Access.
(Translation:-2.ඔන් ස්ක්‍රීන් කීබෝර්ඩ් (On Screen Keyboard) - මෙයනම් ඉතා සරල මෙවලමක් ,අපි භාවිතා කරන Keyboard එක හා සමාන  Keyboardයක්  අපිට screen එකේ දැකගන්න පුලුවන් ,ඇත්තටම මේක keyboard එකේ සමහර keys වැඩ නොකරන අපේ යාලුවන්ටනම් හොද විකල්පයක් වෙයි කියල මන් හිතනවා .මේක අපිට දැක ගන්න ලැබෙන්නෙ start -> All Programmes -> Accessories -> Ease of Access කියන path එකට ගියාමයි.)


3.Resource monitor: As we all know, our computers/laptops begin to slow down or heat at a certain point while being used. Thus, this resource monitor is one of the most important tools on Windows 7 because it allows us to monitor the activities performed by the CPU, Memory and Hard. We can find this in: Start > All programmes > Accessories > System tools.
(Translation:- 3. රිසොස් මොනිටර් (Resource Monitor) - ඇත්තටම මෙය windows 7 වල තිබෙන ඉතාමත් වටිනා tool එකක් කිව්වොත් මන් නිවැරදි ,මොකද ,අපි හැමෝම දන්නවනෙ යාලුවනෙ අපේ computer/Laptop එක හිටි හැටියෙම Slow වෙන්න එහෙමත් නැත්නම් Heat වෙන්න පටන් ගන්නව කියලා ,ඉතිම් මේ Resource Monitor එක අපිට දීල තියෙන්නෙ අපේ CPU එකේ ,Memory එකේ ,ඒ වගේම Hard එකේ සිද්ධ වෙන ක්‍රියාකාරකම් Monitor කරන්න එහෙමත් නැත්තම් නිරීක්ෂණය කරන්නයි .මේක අපිට දැක ගන්න ලැබෙන්නෙ start -> All Programmes -> Accessories -> system tools කියන path එකට ගියාමයි .)


4.Magnifier: This tool is used as a magnifying glass because it can zoom the screen by 1000% times. This tool can be very useful for people who have sight difficulties. The path to this tool is:  Start > All programmes > Accessories > Ease of Access.
(Translation:-4. මැග්නිෆිඅර් (Magnifier) - ඇත්ත යාලුවනේ මේ tool එක හරියට අපි භාවිතා කරන අත්කාචයක් වගේ කිව්වොත් මන් නිවැරදි ,මොකද ,මේ tool එක භාවිතා කරන්නෙ 1000% වතාවක් අපේ screen එක Zoom කරන්නයි ,ඇත්තටම මේක පෙනීම දුර්වල කෙනෙකුට උනත් screen එක පැහැදිලිව දැක ගන්න ඉතාමත් උපකාරී වෙන මෙවලමක් කිව්වොත් මන් නිවැරදියි.මේක අපිට දැක ගන්න ලැබෙන්නෙ start -> All Programmes -> Accessories -> Ease of Access කියන path එකට ගියාමයි.)


5.Remote Desktop Connection: This tool is same as the Team ViewerReal VNCUltra VNC software, which you are using now-a-days. It provides the ability to connect from one Windows 7computer/laptop to another Windows 7computer/laptopand carry out the work accordingly.  However, in order to do this, both computers/laptops should have the same network connection. It can be accessed in: Start > All programmes > Accessories.
(Translation:-5.රිමෝට් ඩෙක්ස්ටොප් කනෙක්ෂන් (Remote Dekstop Connection) - මේ tool එකත් ඔයාලා භාවිතා කරන Team viewer ,Real VNC ,Ultra VNC මෘදුකාංග (softwares) වගේමයි. මෙය windows 7 භාවිතා කරන ඕනෑම Computer/Laptop එකක ඉදල ටවත් ඒහා සමාන windows 7 භාවිතා කරන ඕනෑම Computer/Laptop එකකට ඉතා පහසුවෙන් සම්බන්ධ වෙලා එහි වැඩ කිරිමේ හැකියාව තියෙනවා. හැබැයි මේක සිදුවෙන්නනම් අනිවාර්යයෙන්ම දෙදෙනාම එකම ජාලයක් (Network) එකක් භාවිතා කරන්න ඕනි.මේක අපිට දැක ගන්න ලැබෙන්නෙ start -> All Programmes -> Accessories  කියන path එකට ගියාමයි .)


That’s it for today my dear friends. I hope I was helpful to you and that you guys enjoyed reading my article. Pls comment below and lemme know any improvements, suggestions, criticise and ask any questions. You can also like our Facebook page and contact us. See ya’ll later.
(Translation:-ඉතින් යාලුවනේ ඔයාලට මේ windows tools වගේම තවත් මේ post එකේ සදහන් නොකරපු windows tools ගැන ප්‍රශ්න තියෙනවනම් ,ඒ වගේම ඔයාලට මේ ලිපිය ගැන හිතෙන ,තව ඇතුලත් විය යුතු දේවලුත්,ඉදිරියට සාකච්ඡා කළයුතු දේවලුත් තියෙනවනම් පහත Comment තීරුවෙන් comment කරන්න ,එහෙමත්කි නැත්යනම්ල අපේ Facebook Fan page එකට එකතු වෙලා අපිට Message කරන්න කියල ඉල්ලනවා .එහෙනම් තවත් මේ වගේ ලිපියකින් අපි හම්බවෙනකම්  හැමෝටම සුබ දවසක් ප්‍රාර්ථනා කරනව......................)

Marianas web - The Deepest web Myth (Deep web හි ගැඹුරුතම ස්ථානය ගැන ඔබ නොදත් කරුණු )


Hello everyone. Today I was wondering about a topic which I could share with you guys. As a result of my thinking, I thought of telling you something more regarding the deep web, which many believe it’s a myth, the Marianas web; in other words the deepest part of the deep web.
(Translation:-ඔන්න අද මන් ඔයාලට තවත් ලිපියක් ලියන්න ඕනි කියල හිතුවා ,ඉතින් එකේ ප්‍රතිඵලයක් විදියට මන් හිතුව ඔයාලට Deep web එකට වඩා එහාට ගියපු ,මිතයාවක් (Myth) විදියට ගොඩ දෙනෙක් විශ්වාස කරන  මරිආනස් වෙබ් (Marianas web) එක,එහෙමත් නැතිනම් Deep web එකේ ගැඹුරුම කොටස  ගැන පොඩි විස්තරයක් කියන්න ඔනි කියලා.)

Now, many of you know what this deep web is and what it contains but what we do not know is what Marianas web is. At the same time, you might also wonder why it is named like this… well, the main reason, for it to be named Marianas web, is the world’s most known Mariana Trench. This, my dear friends, is the deepest place in the ocean so as this is also the deepest place in the web it was called Marianas web. However, nobody speaks about this part of the web because, still today, no one has been able to access it as the amount of services and computers are not sufficient.
(Translation:-ඉතිම් යාලුවනෙ ඔයාල ගොඩක් දෙනෙක් දන්නවනෙ මේ Deep web එක කියන්නෙ මොකද්ද ,එහි අන්තර්ගත වෙන්නෙ මොනාද කියල, ඒත් ඉතින් මේ මරිආනාස් වෙබ් (Marianas web) කියන්නෙ මොකක්ද? ඇයි ඒ නම ආවෙ කියල ඔයාලට හිතෙන පුලුවන්......... ඇත්තටම මේකට මරිආනස් වෙබ් (Marianas web) කියලා නම වැටෙන්න ප්‍රධාන හේතුව තමයි අපි හැමෝම දන්න මරියානා ආගාධය (Marianas trench),ඒ කියන්නෙ යාලුවනේ මුහුදේ ගැඹුරුම ස්ථානය මරිආනා  ආගාධය (Marianas trench) වගේ අන්තර්ජාලයේ ගැඹුරුම ස්ථානය මෙය නිසා ඔවුන් මරිආනස් වෙබ්  (Marianas web)  යන නම පටබදින්න හේතුව එය වුනා , ඒත් ඉතිම් ගොඩක් අය මරිආනස් වෙබ් (Marianas web) පිලිබඳව අදහස් නොදැක්වීමට හේතුව එය සොයාගැනීමට මෙතෙක් කිසිදු පුද්ගලයකු සමත්වී නොතිබීමත් ,එයට යාමට දැනට ලෝකයේ පවතින අන්තර්ජාල සේවාවන් සහ පරිඝණක ප්‍රමාණවත් නොවීමත් යන කරුණුයි.)

Moreover, many internet service providers believe that Marianas web may contain a vigorous artificial intelligence with a high profile. Yet, it is believed by many to be a myth because its nature is still not considered by the web and also it has a digital technology which cannot be counted.
(Translation:-එහෙත් අන්තර්ජාල සේවාවන් සපයන බොහෝ පුද්ගලයන් විශ්වාස කරන අන්දමට Marianas web හි පැවතිය හැක්කේ ආවේගශීලී වු කෘතීම බුද්ධියකින් (Artificial Intelligence) සමන්විත  සුපිරි බුද්කාධියකින් හෙබි කාන්වතාකගේ ආකෘතියක් බවයි.එහෙත් එම ස්භාවය අන්තර්ජාලය නොසලකා හැරි ගණනය කල නොහැකි ප්‍රමාණයේ ඩිජිටල් තාක්ෂණයකින් අන්තර්ගතවීමෙන්  මෙය හුදෙක් මිතයාවක් ලෙස සැලකීමට  බොහෝ දෙනා  යොමුවී තිබෙනවා.)
 That’s it for today my dear friends. I hope I was helpful to you and that you guys enjoyed reading my article. Pls comment below and lemme know any improvements, suggestions, criticise and ask any questions. You can also like our Facebook page and contact us. See ya’ll later.
(Translation:-ඉතින් යාලුවනෙ ඔයාලට මේ ලිපිය ගැන හිතෙන දේවල් වගේම,තව ඇතුලත් විය යුතු දේවලුත්,ඉදිරියට සාකච්ඡා කළයුතු දේවලුත් තියෙනවනම් පහත Comment තීරුවෙන් comment කරන්න කියල ඉල්ලනවා .එහෙනම් තවත් මේ වගේ ලිපියකින් අපි හම්බවෙනකම්  හැමෝටම සුබ දවසක් ..........)